Introduction
The Parker AC10 is a well-featured Variable Speed Drive (VSD) covering a wide power range. This page supports end users and installers with operating, commissioning and troubleshooting the AC10.
This page is divided into the following sections. Use the links below or scroll through the full page.
This page is specific to the AC10. For more general assistance, our other Help and Guidance pages may also be useful.
Checklist
Before First Start-Up

- Must be installed as detailed in the AC10 User manual. Ventilation, input protection and cable selection are particularly important.
- The motor is securely connected, configured correctly (Star or Delta), and is within the rating of the AC10.
- On the first time of running the motor, run it at a slow speed to check the direction of rotation is as required.
At Power Down -
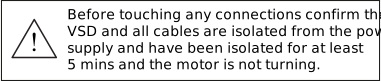
During Fault Investigations

Make a note of any faults that occur as our technical helpline will need details of the fault along with details of when the fault occured.
Return to the top
Common AC10 Parameters
The most common AC10 parameters are listed below. For more common values, see our Easy Start Guide. For all parameters, see the AC10 User Guide.
| Parameter |
Description |
Required / Typical Setting |
| F803 |
Motor Rated Current |
As given on the motor nameplate (A) |
| F802 |
Motor Rated Voltage |
As given on the motor nameplate (V) |
| F801 |
Motor Rated Power |
As given on the motor nameplate (kW) |
| F805 |
Motor Rated Speed |
As given on the motor nameplate (rpm) |
| F114 |
Acceleration Time |
5 - 10 seconds |
| F115 |
Deceleration Time |
5 - 10 seconds typical. Increase if Over Voltage (OE) trips occur during stopping. |
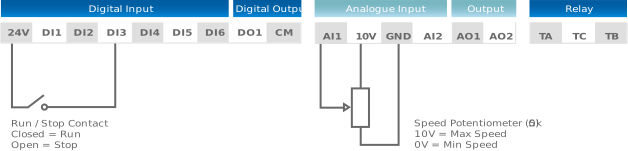
AC10 Default Wiring Diagram
External Stop/Start and Speed reference controls when set to default values. Function of inputs can be changed if required.
Return to the top
Resetting the AC10 to Factory Defaults
Below is an extract from the AC10 Easy Start Guide explaining how to reset the VSD to factory defaults. This can be useful during commissioning.
With the motor stopped, press the M key repeatedly until the parameter list is shown.
The parameter list is prefixed with F. In this example, F800 is shown below.
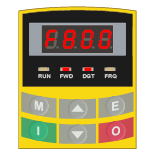
Press the red stop key (O) to select the first digit on the left-hand side. This represents the parameter group, such as F100, F200 or F800.
Use the up and down keys to select parameter group F100.
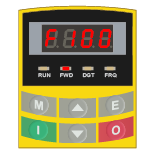
Press the red stop key (O) to select the last two digits on the right-hand side. These represent the parameters within the selected parameter group.
Use the up and down arrow keys to select parameter F160. Press E to select this parameter.
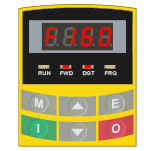
The initial value of F160 is 0. Use the up and down arrow keys to change this value to 1.
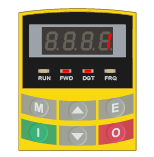
Press E to save the new value. While resetting, the display will go blank briefly before returning to the parameter list.
The factory reset is now complete.
Return to the top
How to Change a Parameter on a Parker AC10
To change a parameter value using the front-mounted keypad, follow the instructions below. This is an extract from our Easy Start Guide.
In this example, we will change parameter F803, which is the motor rated current. This important value must be set to match the value shown on the motor nameplate.
With the motor stopped, press M repeatedly until the parameter list is shown.
The parameter list is prefixed with F, as illustrated below.
Press the O key, the red stop key, to select the first digit on the left. This represents the parameter group, such as F100, F200 or F800.
Use the arrow keys to select parameter group F800, as shown below.
When the parameter groups are being viewed, the DGT indicator is not illuminated.
Press the O key, the red stop key, to select the last two digits on the right. These represent the parameters within the selected parameter group.
The DGT indicator will now be illuminated, as shown below.
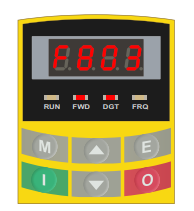
Use the arrow keys to select parameter F803. Press E to edit the parameter value.
The display will show the current parameter value.
Use the O key, the red stop key, to select a digit. The selected digit will flash.
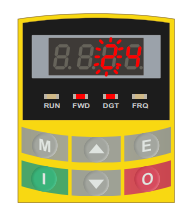
Use the arrow keys to select the required value. In this example, the value is 2.4.
Press E to save the new value. The display will return to the parameter reference.
The parameter value has now been saved.
Press the M key once to move back to the parameter groups. The DGT indicator will go out.
Return to the top
AC10 Fault and Trip Codes
When the AC10 is in a fault condition, a fault message will appear on the display. You can reset the AC10 using the red stop key on the front of the VSD. Before resetting the unit, it is important to identify the fault and take remedial action. Repeatedly resetting the VSD without dealing with the underlying problem can damage the unit.
Below are some of the most common faults. For details of all trip codes, please see the Troubleshooting section of the AC10 User Manual.
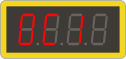
Over Current Trip - OC / OC1
Meaning: A high current level has been detected that is beyond the rating of the VSD.
Likely causes: Excessive motor load, broken motor cable, output short circuit, short acceleration time, or incorrect motor parameters.
What to check: Check the motor and load, motor cable condition, acceleration ramp time, and that the motor nameplate details have been entered correctly.
Important: Do not repeatedly reset the drive without investigating the cause of this trip.
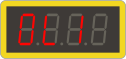
VSD Overload - OL1
Meaning: A current level has been detected that is beyond the rating of the VSD for more than 60 seconds (I2T).
Likely causes: Excessive motor load, excessive periodic load, or incorrect motor parameters.
What to check: Check that the motor nameplate details have been entered correctly and reduce the load.
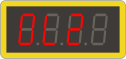
Motor Overload Trip - OL2
Meaning: A current level has been detected that is beyond the rating of the motor.
Likely causes: Excessive motor load or incorrect motor parameters.
What to check: Check the motor nameplate details have been entered correctly.
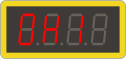
Over Temperature Trip - OH1
Meaning: A temperature level has been detected inside the unit that is beyond the rating of the VSD.
Likely causes: High ambient temperature, inadequate cooling or insufficient clearance around the unit.
What to check: Cooling fans are working, filters are clean and there are no obstructions around the VSD.
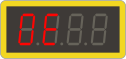
Over Voltage Trip - OE
Meaning: A voltage level has been detected on the DC link that is beyond the rating of the VSD.
Likely causes: Short Deceleration ramp time, AC mains supply is too high or the inertia of the load is too high.
What to check: Reduce the deceleration time or add a brake resistor to the installation.
Important: Do not repeatedly reset the drive without investigating the cause of this trip.

Phase Loss on the Output - PFO
Meaning: An imbalance of current has been detected on the output of the VSD.
Likely causes: Insecure motor connection, broken motor cable, or inverter hardware issue.
What to check: Check the motor cables and connections. If the fault remains with the motor disconnected, the drive may require repair or replacement.
Important: Do not repeatedly reset the drive without investigating the cause of this trip.

Under Voltage - LU
Meaning: A voltage level has been detected that is below the rating of the VSD.
Likely causes: The mains supply is too low or incorrect, or the VSD is powering down.
What to check: Check the mains supply matches the rating of the unit.
Important: If the unit is powering down, this fault can be ignored.
For more suggestions of possible causes and solutions, please see our Help and Guidance page for common VSD trips.
If you need more information please go to our Help and Guidance home page
Return to the top
Useful Documents
The Easy Start Guide is a short document created by Inverter Drive Supermarket. It gives step-by-step instructions on how to wire and programme the AC10 in its most basic form. This is very useful for anyone unfamiliar with the AC10 or VSDs.
Two versions are available: one for units up to 22kW and one for units 30kW and above. There are only small differences between the two versions, but because the guide is very graphical and the keypads are slightly different, two documents have been created for accuracy.

The User Guide is a Parker document for the AC10 product.

Return to the top
Programming a Parker AC10 Using DSELite Software
Download DSELite from the Parker website
Created by Inverter Drive Supermarket Ltd. Last revised October 2026.